
Tutorial: How to Crochet a Cloche Hat.
Or, more appropriately titled, Mary's Hat at the Station.Do you remember Mary? Sweet, charming, little lady, all dressed up and wide-eyed, and ready to face the world? The same lady who let me sleep in her car when I was spent as she drove me to Aduana, and helped me pick out my first own sewing machine, and and who fed me chocolate striped rice cakes? That lady?
She told me about two weeks ago that she had finally got the job she'd been waiting for, and was moving on. This pretty much came as a shock to me, but I wanted to make it count. I dropped everything, and did my best to make her something I hoped she'd love on such short notice.
I decided to make her a cloche hat, and did some research for the quickest and best-looking one I could find. I came across this tutorial for the hat, and this tutorial for my first-planned rose. I later on decided against this rose pattern, darling as it was; it was frustrating to find I couldn't fold the petals nicely 'round each other for the life of me. I later decided to use this tutorial for a small rose and adapt it for my purposes, and I was happy.
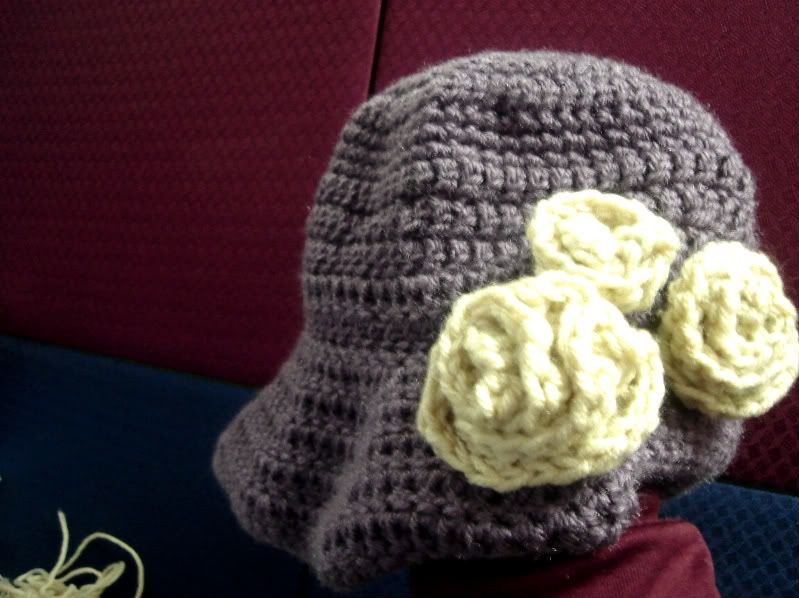
And here it is.

And here she is.

But the best thing I ever received that day were Mary's eyes brimming with almost-tears. And a hug. And so much joy and love on her face.
I do remember having difficulty walking away from so much emotion. I believe my knees had completely and irrevocably turned to jelly.
She wore it on her last day at work today, pairing it with a 1920's dress and darling shoes. she brought and fed us pancit and chocolate cake, but ye gods, I will miss this woman and her sweet charm.
It's be lovely if we could keep in touch. Absolutely lovely.
**This tutorial has been adapted/ translated into list form from proudmommy's website. She is the original creator, and it would be lovely if you dropped by to say hello. She also has wonderful collection of other crocheted hats, so I really do suggest you head over and check out her other beauties.You will need:
The rose pattern has been adapted from the the above video tutorial to suit the needs of this hat.
Now, then, on with the show!
- A US Size 9/ I / 5.5mm crochet hook for the hat,
- A US Size 5/ F /3.75 mm crochet hook for the roses,
- Medium Weight Yarn (I used Lion Brand's Vanna's Choice in Dusty Purple for the hat, and Bernat's Super Value in Oatmeal.)
- a tapestry needle, or a cross-stitch needle
- a pair of scissors
Round 1: ch 4, 12 dc in first st, join in ch. (Just grab one loop from top of the chain. This makes the seam less visible, and this will make a circle.) [12]
Round 2: ch 3, work 1 dc where chain is (in same st as join – ch3 counts as first dc), 2 dc in each stitch, join with sl st (remember, the ch counts as a st!). [24]
Round 3: ch 3, work 1 dc where chain is, (work 1 dc, 2 dc in next stitch) around. Join. [36]
Round 4: ch 3, work 1 dc where chain is, (work 1 dc in next 2 sts, 2 dc in next st) around. Join. [48]
Round 5: ch3, work 1 dc where chain is, (work 1 dc in next 3 sts, 2 dc) around. Join. [60]
Round 6: ch4, work 1 dc where chain is, (work 1 dc in next 4 sts, 2dc) around. Join.
Round 7 :ch2, work 1 sc in next st and each sts. Join.
Round 8: ch2, 1 sc in next st and each sts. Join.
Round 9: ch2, (1 sc in next 10 sts, sc dec/sc2tog) around. Join.
Round 10: ch3, work 1dc in each sts. Join.
Round 11: ch3, work 1dc in next sts, dc dec/ dc2tog) around. skip the last st before the ch. Join.
Round 12: ch3, work 1dc in each sts. skip the last st before the ch. Join.
Round 13: ch3, work 1dc in each sts. skip the last st before the ch. Join.
Brim
Round 14: ch2, work 1 sc in each sts. Join.
Round 15: ch2, work 1 sc in each sts for 15 sts. (work 1 dc in next 5 sts, 2dc) until last 15 sts. Switch back to working 1 sc in each sts until the end. Join.
Round 16: ch2, work 1 sc in each sts for 15 sts. (work 1 dc in next 6 sts, 2dc) until last 15 sts. Switch back to working 1 sc in each sts until the end. Join.
Round 17: ch2, work 1 sc in each sts for 15 sts. (work 1 dc in next 7 sts, 2dc) until last 15 sts. Switch back to working 1 sc in each sts until the end. Join.
Round 18: ch2, work 1 sc in each sts for 15 sts. (work 1 dc in next 8 sts, 2dc) until last 15 sts. Switch back to working 1 sc in each sts until the end. Join.
Round 19: ch2, work 1 sc in each sts for 15 sts. (work 1 dc in next 9 sts, 2dc) until last 15 sts. Switch back to working 1 sc in each sts until the end. Join.
Round 20: ch2, work 1 sc for each sts around. bind off, cut your yarn, and weave in ends.
Turn the hat inside-out if you wish.
Roses:
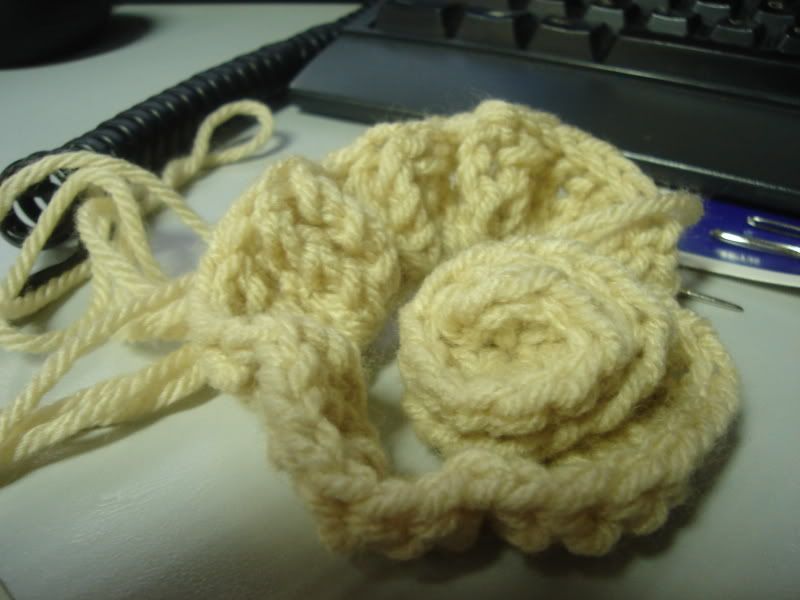
Row 1: ch 45 sts. in the second ch from the hook, work 1 sc in each st for the next 4 sts. switch to dc, and work 2dc in each st for the next 15 sts. switch to tr, work 2tr in each st for the next 10 sts. switch to dtr, and work 2dtr in each st all the way until the end. sl sts into the last st base of the last 2dtr. close and snip off yarn. weave in ends.
Take your tapestry needle (or cross-stitch needle will do), and thread a length of yarn of the same color. Begin from the sc end by weaving the needle in and out of the base ch, side to side.

Pull tightly. You may have to ensure the tail doesn't go slipping through. Just ensure the length of crot you've threaded through is tightly bunched up.

Continue doing this, forming your spiral rose as you go.
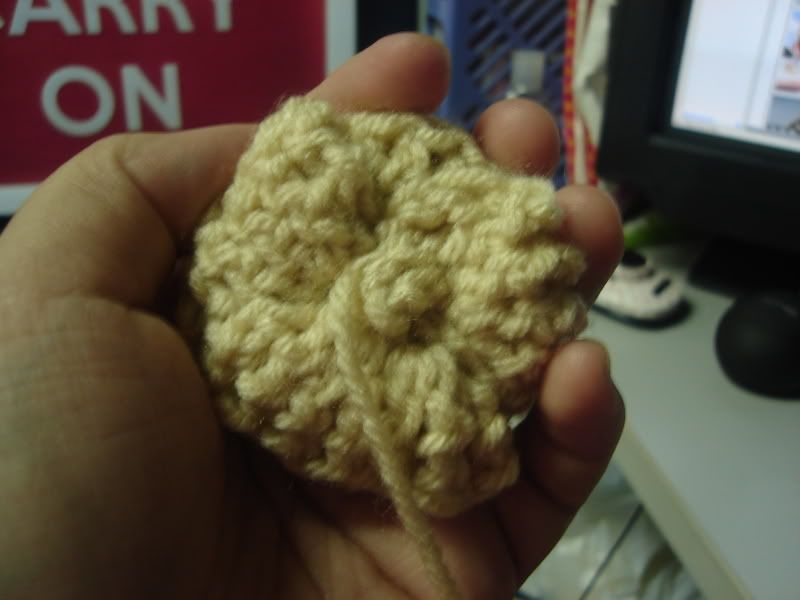
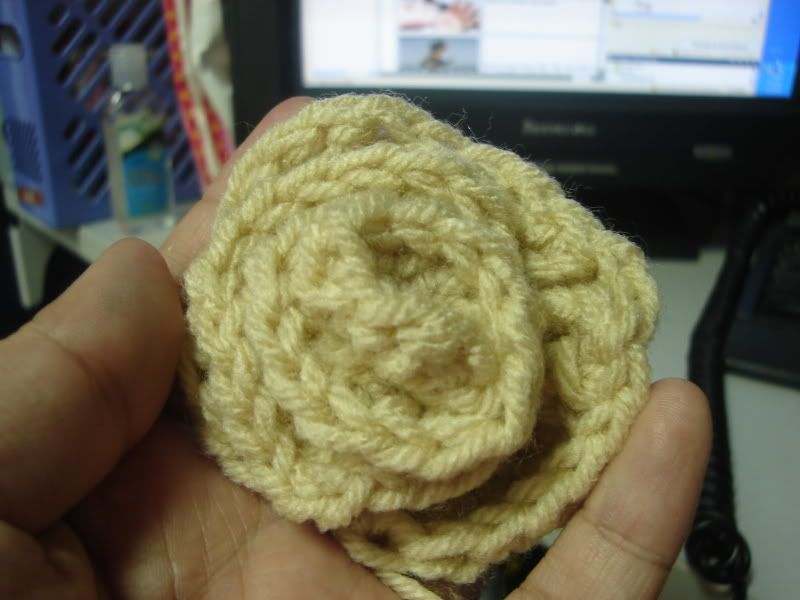
Et Viola! A finished rose.
You can sew the roses onto the hat permanently, or sew them onto brooch pins for easy positioning, or using them as a brooch on you.


It turned out wonderful!! I wish her the best of luck!
ReplyDeleteAaaw, thanks, Megan! We'll send her off with lots of love and kisses. :)
ReplyDeleteVery Coco Chanel, lovely. Speaking of which Coco avant Chanel DVD will be released tomorrow!
ReplyDeleteOooh! thanks for the heads-up, gene! Time to be on the lookout for a good copy, then. :)
ReplyDelete